Accessing Create or Edit Mode
- To create a new CM Work Order, use the (+) icon on the toolbar
- This will open an overlay “Create Work Order” window

- This will open an overlay “Create Work Order” window
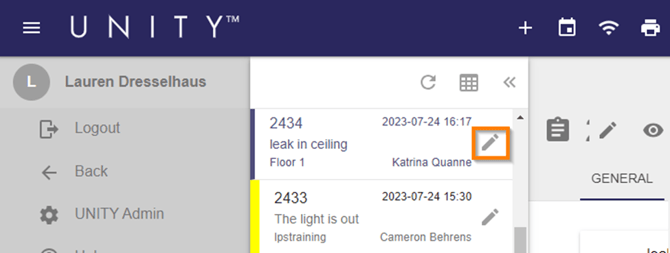
- To edit an existing Work Order, use the pencil icon on the Work Order View screen
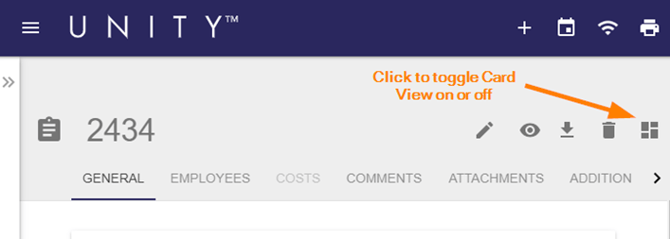
- On a desktop, the user has two options for Viewing and Editing information
-
- Tab View: information is divided into separate tabs by topic (General, Employee, Responses, etc)
- Card View: information is divided into separate, scrollable cards by topic on the same screen
-
- On a mobile device, the user will see the information in a one screen mode that is scrollable.
- The user can also access the Edit function from within the Secondary Menu, as shown below
General Section (Creating and Editing)
The information fields in the General section function the same while both creating and editing a Work Order. When editing a Work Order, there will be some fields visible in the General section, such as Aging or Requestor’s Name, that will not be editable.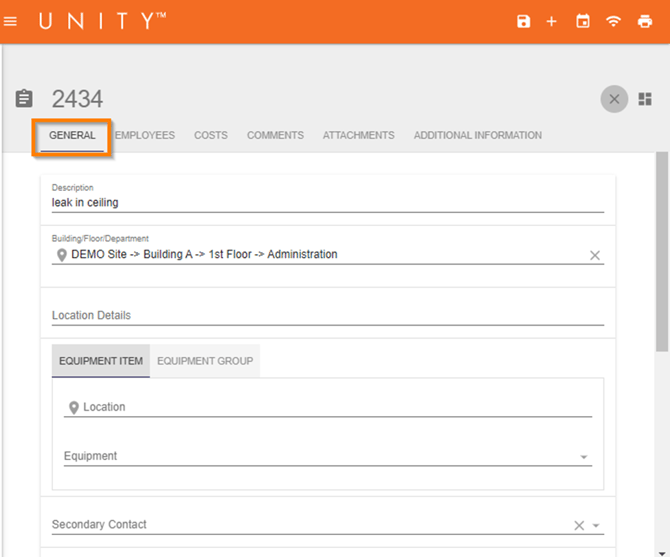
- Description: click in the field to type a brief description of the issue
-
- When in Edit mode, this field WILL be editable, just click in the field and make the appropriate edits

- Location: To modify the Work Order Location, click in the Location field to open the Location Selector
- Click the (>) icon to filter down to the desired location

-
- Click a location name to select it as the Work Order Location

- Once a location has been selected, it can be removed by clicking the (X) icon, but Location is a required field so a new location must be selected following the above process

- Location Details: When creating or editing a work order, click in the field to type additional information to help clarify the location of the issue

- Click a location name to select it as the Work Order Location
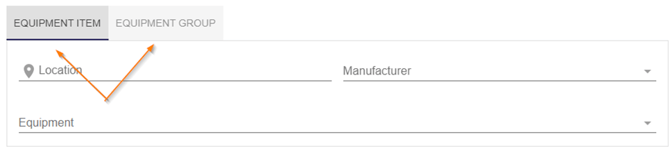
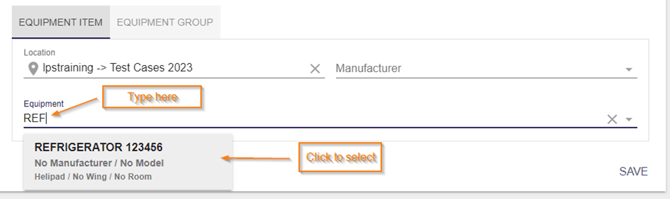
- Equipment/Equipment Group: A single asset (Equipment Item tab) or an existing group of assets (Equipment Group tab) can be associated to a work order
- For information on creating Equipment Groups, please refer to our UNITY Schedule Editor guide
- Depending on their automation set-up in the UNITY Schedule Editor, PM work orders may include a default equipment item or group
-
- Click in the field labeled “Location” to choose the location of where the equipment item is located

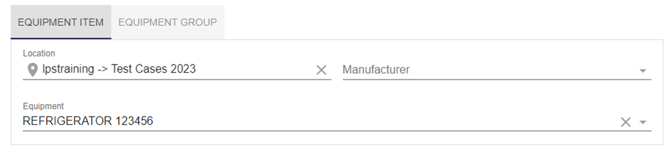
- Once the Equipment Location is selected, click in the field labeled “Equipment” and scroll through the list or begin typing to filter results, then click to select the desired equipment item
- Click in the field labeled “Location” to choose the location of where the equipment item is located
-
- To change the item associated to the work order, click the item name to re-open the list of available items or click the X to remove the item altogether
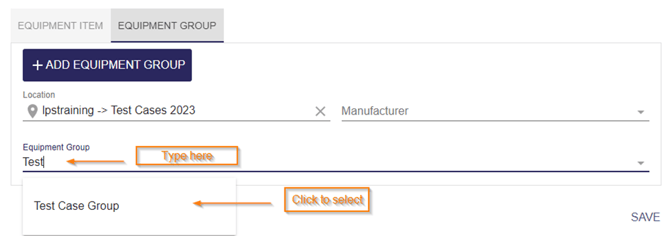
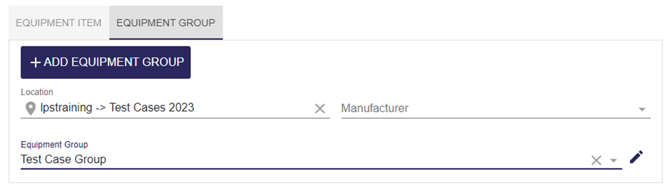
- To associate an Equipment Group, follow a similar process to search for a group by name
- To change the group associated to the work order, click the group name to re-open the list of available groups or click the X to remove the group altogether
- Secondary Contact: Click in the field and choose an option from the drop-down menu to select another login user as the Secondary Contact for questions about the work order

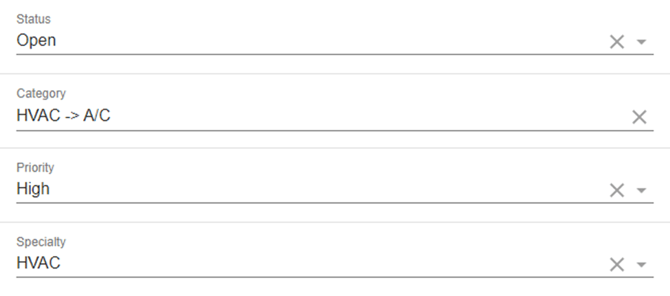
- Status/Category/Priority/Specialty: To add or update a selection in any of these fields, click in the field and choose an option from the drop-down menu
- To change the item associated to the work order, click the item name to re-open the list of available items or click the X to remove the item altogether
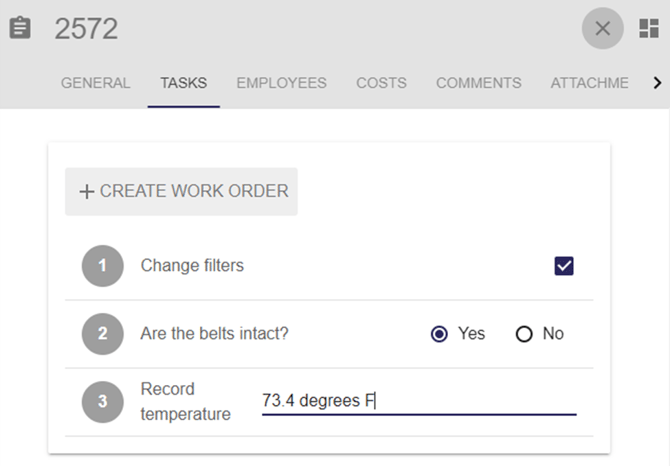
Tasks Tab (PM/PE Only)
When editing a PM (Preventive Maintenance) or PE (Planned Event) Work Order in UNITY, the user can add Task Responses to indicate the tasks have been completed. PM/PE Tasks are selected via the UNITY Schedule Editor.
- To edit Checkbox tasks, click the checkbox to mark it off
- To edit Yes/No tasks, click the bubble next to the appropriate option
- To edit Text Field tasks, click the line and begin typing to enter the necessary info
Employee Section (Creating and Editing)
This section is used to add or modify the employee(s) assigned to the work order, and can also be used for the assignees to track the time spent on the Work Order. The information fields in the Employee section function the same in either Create or Edit mode.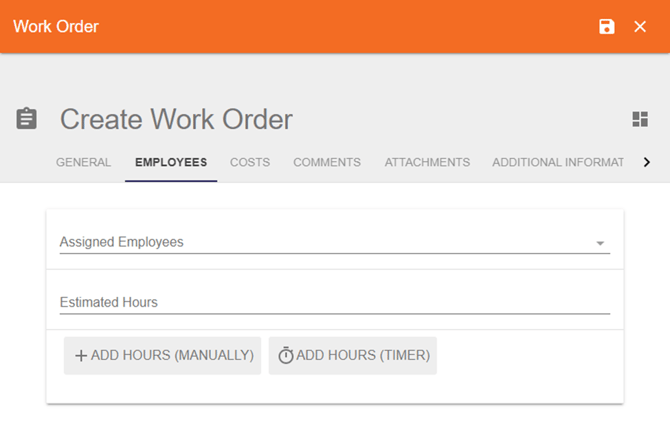
- Assigned Employees: click in the field and select a name from the drop-down menu or begin typing to filter results

- To remove an Assigned Employee on the Work Order, click the (X) to remove the current entry,

- To remove an Assigned Employee on the Work Order, click the (X) to remove the current entry,
- Estimated Hours: to include estimated hours, click in the field to enter manually, or use the up/down arrows to increase in increments of 1

- Add Hours: either while creating or editing, the user can add hours manually or by using a timer
- To remove an existing time entry, click (X)
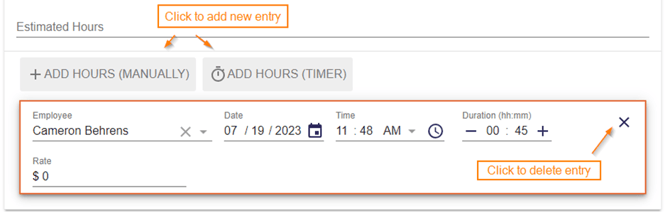
- When the user selects an Add Hours option, a new entry will appear outlined in orange and at above any other Hours entries that may exist on the Work Order
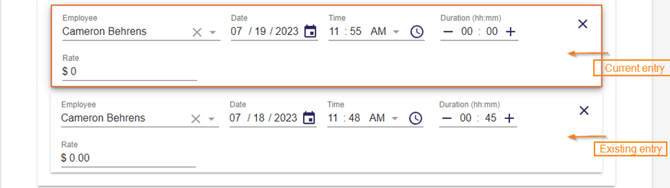
- To enter hours manually, click Add Hours (Manually)

- To change the Employee whose time needs to be added to this Work Order, click in the field and select a new employee (defaults to the current user)
- To change the Start Date, click in the desired field (month/date/year) and choose the new value (defaults to current date)
- To change the Start Time, click in the field and change manually or use the up/down arrows (defaults to current time)
- To change the Duration (amount of time spent on the Work Order), use one of the following methods:
- Click in the field to enter time manually (enter time using hours and minutes (hh:mm) format)
- Use the + or – buttons to add time in 15-minute increments
- To change the Rate, click in the field and enter manually, or use the up/down arrows (this is based on the user’s role so not all users will see this option)
- To enter hours using the timer option, click Add Hours (Timer) for each new entry
- Clicking this button automatically starts a timer (a user cannot start multiple timers on the same work order or on several different work orders)
- To end the timer and complete the hours entry, click “Stop”

- After the timer has been stopped, the entry is editable using the same process as a manual entry
- When a timer is in progress on a Work Order, a stopwatch icon appears in the main toolbar (clicking this timer will take the user to the Work Order with the active timer)

- New Hours entries and changes to existing entries are not officially added to the Work Order until the user clicks the Save icon
- A dialogue box stating “Successfully Updated!” will appear in the bottom left-hand corner to confirm the Work Order has been saved
Costs Section (Creating and Editing)
This section is used to record any parts or materials used in the completion of this Work Order. Customers can upload a list of Parts to select from, or manually enter them as Materials on the work order. Additionally, this section can be used to store information on invoices related to the work order.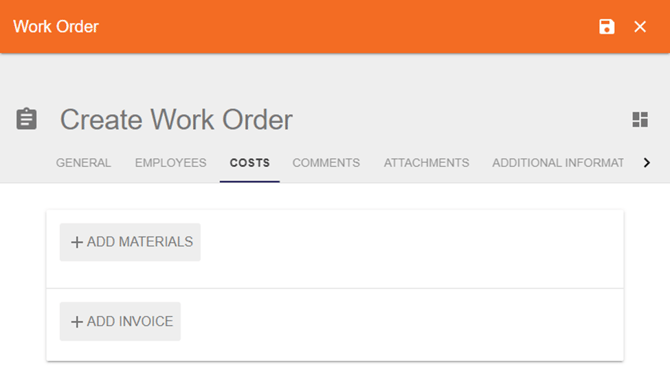
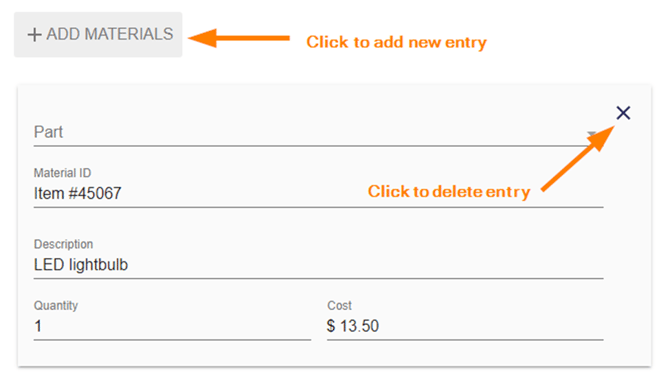
- Click “+Add Materials” to add a new Part/Material entry
- If a Parts list has been pre-loaded, the Material ID, Description, and Cost fields will populate with the info for the selected Part, and the user will just update the Quantity as needed
- If the user is adding a manual entry, use the fields as indicated below
- Material ID: Enter important details, such as manufacturer or purchase order information
- Description: Give the Material a name (this is what will display on the View page)
- Quantity: Indicate the number used during the work order
- Cost: Enter the cost of a single item for this Materials entry (after the work order is saved, the system will calculate the total cost as Quantity multiplied by Cost)
- New entries and changes to existing entries in this section are not officially added to the work order until the user clicks the Save icon
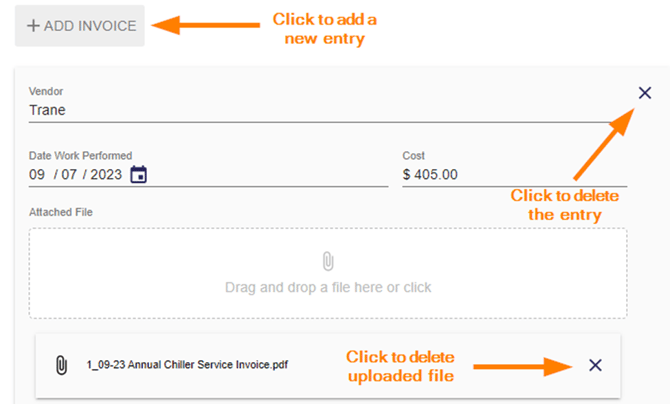
- To add invoicing information to the work order, click “+Add Invoice” and update the fields to include the vendor/cost info
- Vendor: Enter the name of the vendor who completed the work
- Date Work Performed: Enter the date when the vendor was on site to perform the service
- Cost: Enter the billed amount on the invoice
- Attached File: Upload a PDF or picture file (.jpg, .jpeg, or .png) of the invoice
Comments Section (Creating and Editing)
This section is used to provide detailed updates on the Work Order to keep the Work Order Requestor up to date on progress, delays, etc. Comments made on a work order are visible to the requestor and all users.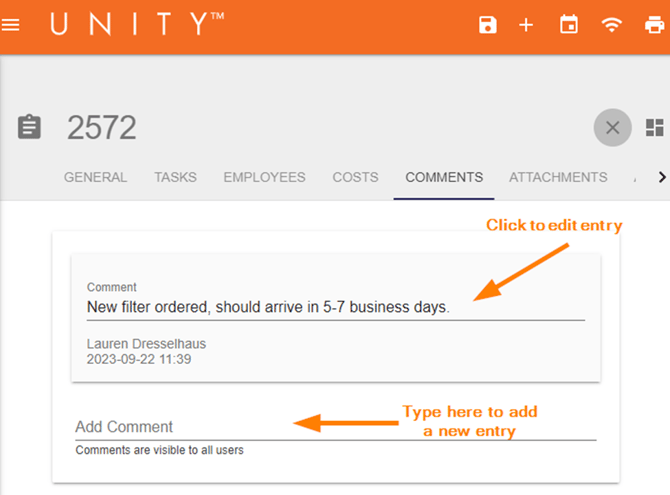
- To edit an existing Comment, click in the field to make the desired modifications
- Users can edit the Comments they have entered themselves, but may need an additional permission to edit Comments entered by other users
- To add a new Comment, click in the field labeled “Add Comment” and begin typing
- New Comment entries and changes to existing entries are not officially added until the Work Order is saved
Attachments (Creating and Editing)
This section can be used to upload pictures saved to a user’s desktop or mobile device. If the user is creating/editing the Work Order on a mobile phone or tablet equipped with a camera, they can take and upload a picture while on location. Supported Attachment file types include GIF, JPEG, JPG, MP4, PDF, and PNG. The size restriction for an individual file is 25 MB.
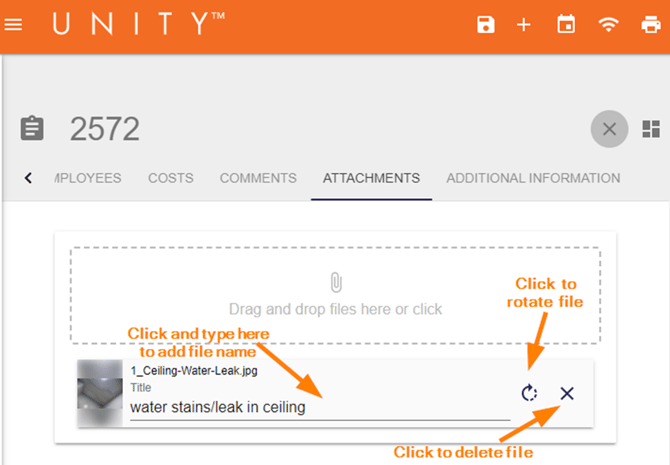
- New Attachments and changes to existing entries are not officially added to the work order until the user clicks the Save icon
Additional Information (Creating and Editing)
If the customer uses Cost Centers, they can use this section to select the appropriate Cost Center for the Work Order. There will be additional fields (Date Submitted, etc) that display on this tab, but they will not be editable.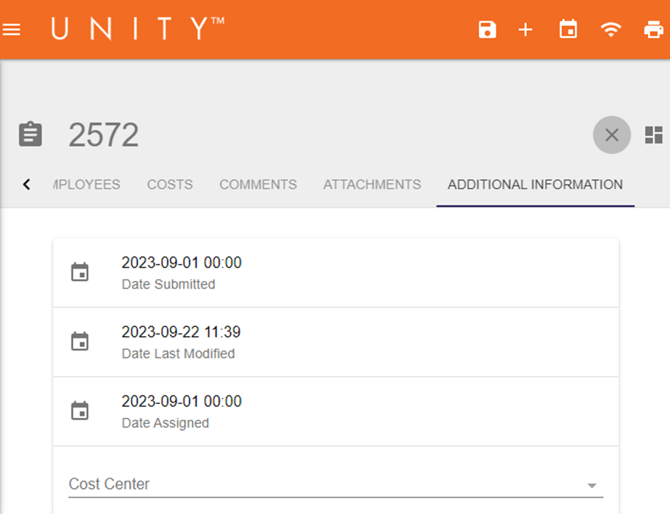
- To add a Cost Center, click in the “Cost Center” field and choose an option from the drop-down
- To change the selected Cost Center, click in the same field and choose the new option from the drop-down
- To remove the Cost Center and change the entry to “Not Specified,” click (X)

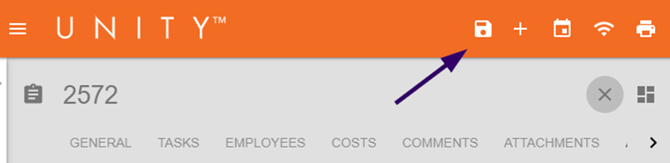
Saving the Work Order
At any point during the Create or Edit process, the user can choose to save the Work Order or to discard all changes made. Discarding during the Create process will cause the user to lose all progress on the new Work Order. Discarding during the Edit process will cause the Work Order to revert back to the previous information.
- To complete the creation of a new Work Order or to save the edits on an existing Work Order, click the Save icon at the top of the screen
- If a timer is running when the user clicks Save, they will be prompted to either end the timer or leave it running

- If a timer is running when the user clicks Save, they will be prompted to either end the timer or leave it running
- To exit Create or Edit mode without saving changes, click the (X) icon to discard
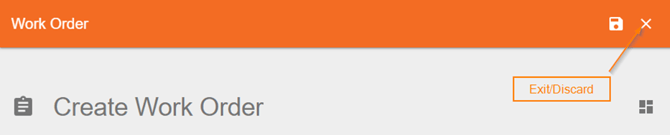
- If the user has started a timer on a Work Order, it will continue to run even if the user discards other changes made